

No matter how fastidious you are about your skincare regime, or about keeping your home clean, your computer keyboard will inevitably accumulate a hideous layer of gunk over time that hides away between the keys, being gross. It’s not particularly harmful, but it might accumulate to the point where key presses don’t always register, which can be rather annoying.
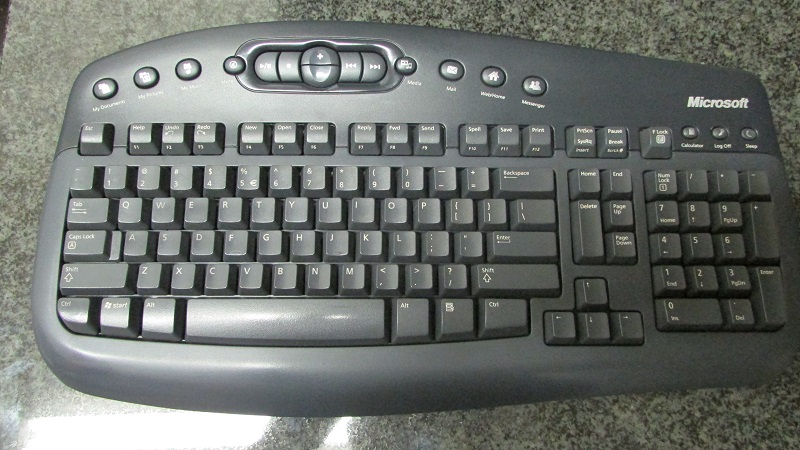
Which is why you absolutely should clean your keyboard every once in a while. Sure, we live in a throwaway culture where we’re encouraged to buy new stuff when the old stuff gets dirty or breaks, but there are still people who are attached to their keyboards because the design is just right and no new keyboard has yet offered a superior typing experience. I should know, I am one of them – I am VERY attached to my Microsoft Wireless Multimedia Keyboard 1.1.
The question is, how to go about it? In the pursuit of journalistic excellence, I volunteered my keyboard for cleaning so that I could take you through the process.
Here’s what I used:
Some sort of household cleaner: I used Easy Off Bang because it’s a really good product plus it doesn’t damage plastic.
A large brush: I used the one that came with my dustpan.
An old toothbrush: This is for the bits your big brush can’t reach.
A screwdriver with a narrow head, or a kitchen knife: This is to stick in the tiny gaps between your keys to help lever them out.
Duct tape to wrap around your knife or screwdriver to prevent damage to the keys. Be careful with how much you apply, though, as too much can make the implement too thick to get into the keyboard’s tiny gaps.
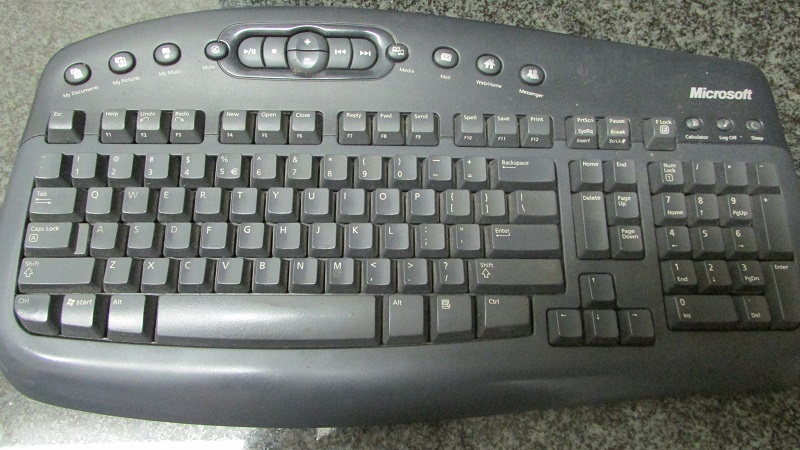
Step 1. Take a picture of your keyboard so that you have a point of reference when it comes to putting the keys back in their correct positions.
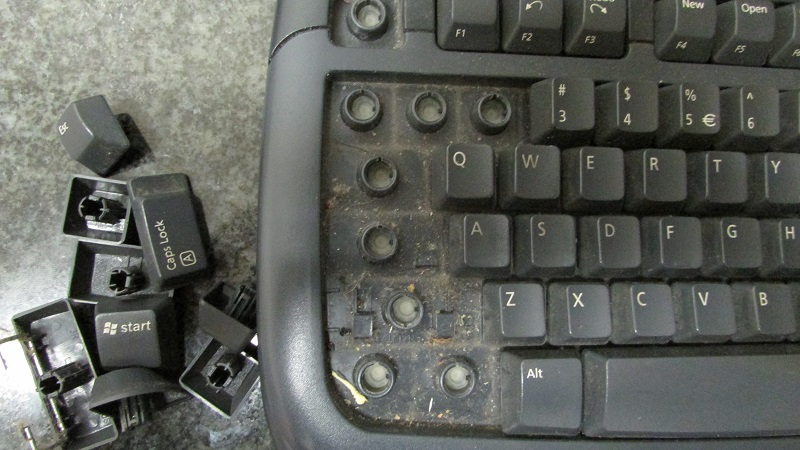
Step 2: Remove the keys. The process is fairly simple, once you’ve got the hang of it: all you need to do is insert your chosen implement between the keys, and lever each one loose. I used my finger on the key’s other edge to balance the force I applied with my implement so that I didn’t damage anything. When you get it right, the key will just pop off.
Step 3: Be revolted at the accumulated miffness that has been lurking millimetres from your fingertips for years. Yuck.

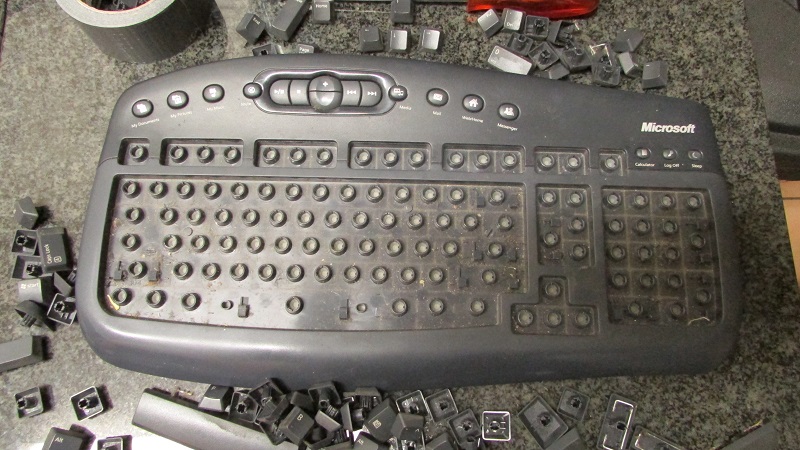
Step 4: Clean the naked keyboard. This part was relatively simple: I brushed as much of the dirt out as I could using a brush from the dustpan-and-brush set I had in my cleaning cupboard, and the bits that stubbornly refused to budge were pried loose with an old toothbrush. Once that was done, I carefully sprayed Easy off Bang between the key holes and the multimedia keys, let it soak in the dirt for a few seconds and then ran a cleaning cloth over everything until all surfaces were clean and dry.
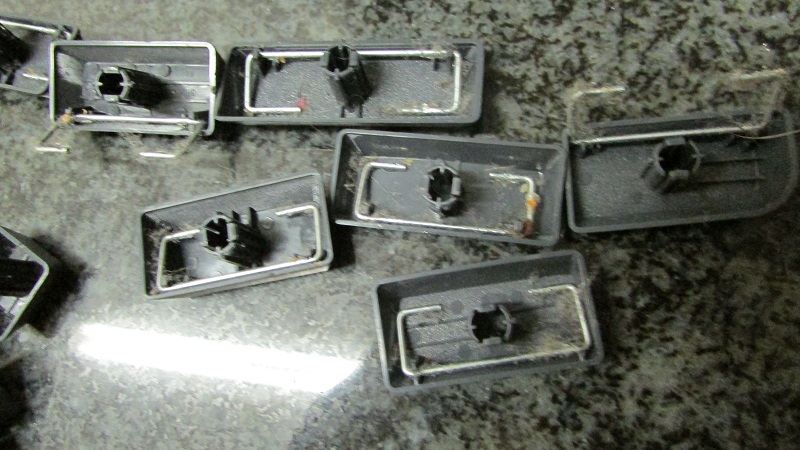
Step 5: Wash your manky keys. As you can see from the image, the larger keys and the metal clip thingies they use to provide even feedback to your presses tend to gather the worst of the muck. I popped all keys into a plastic container, filled it with water and soap, swooshed everything around for a few minutes and then chucked the contents into a colander to drain the water. I then dried the keys off with a dishcloth, and set them in front of a fan for a few minutes so that the liquid I couldn’t reach could evaporate on its own.
Step 6: Reassemble. Once everything is clean and dry, all you need to do is clip the keys back into place. You’ll be very happy you took that reference image, because as good as you think you are at typing, unless you have an eidetic memory you won’t know exactly where everything goes, especially keys like [, – and `.
And you’re done! Enjoy your swanky, like-new keyboard. Long may it serve your fingers!

